

Before you begin
Make sure that you have:- An AWS account where you can create KMS keys, IAM policies, and IAM roles.
- Your PrimeVault integration running on EC2 instances or on an EKS cluster.
- Permission to create an API user in PrimeVault.
Overview
- Create the KMS key that holds the API user’s private key.
- Create a signing policy that allows signing with that key only.
- Give your EC2 instances or EKS Pods the signing policy.
- Register the public key and configure the SDK.
Create the KMS key
1
Configure the key
In the AWS console, go to KMS and select Create key. Select these settings: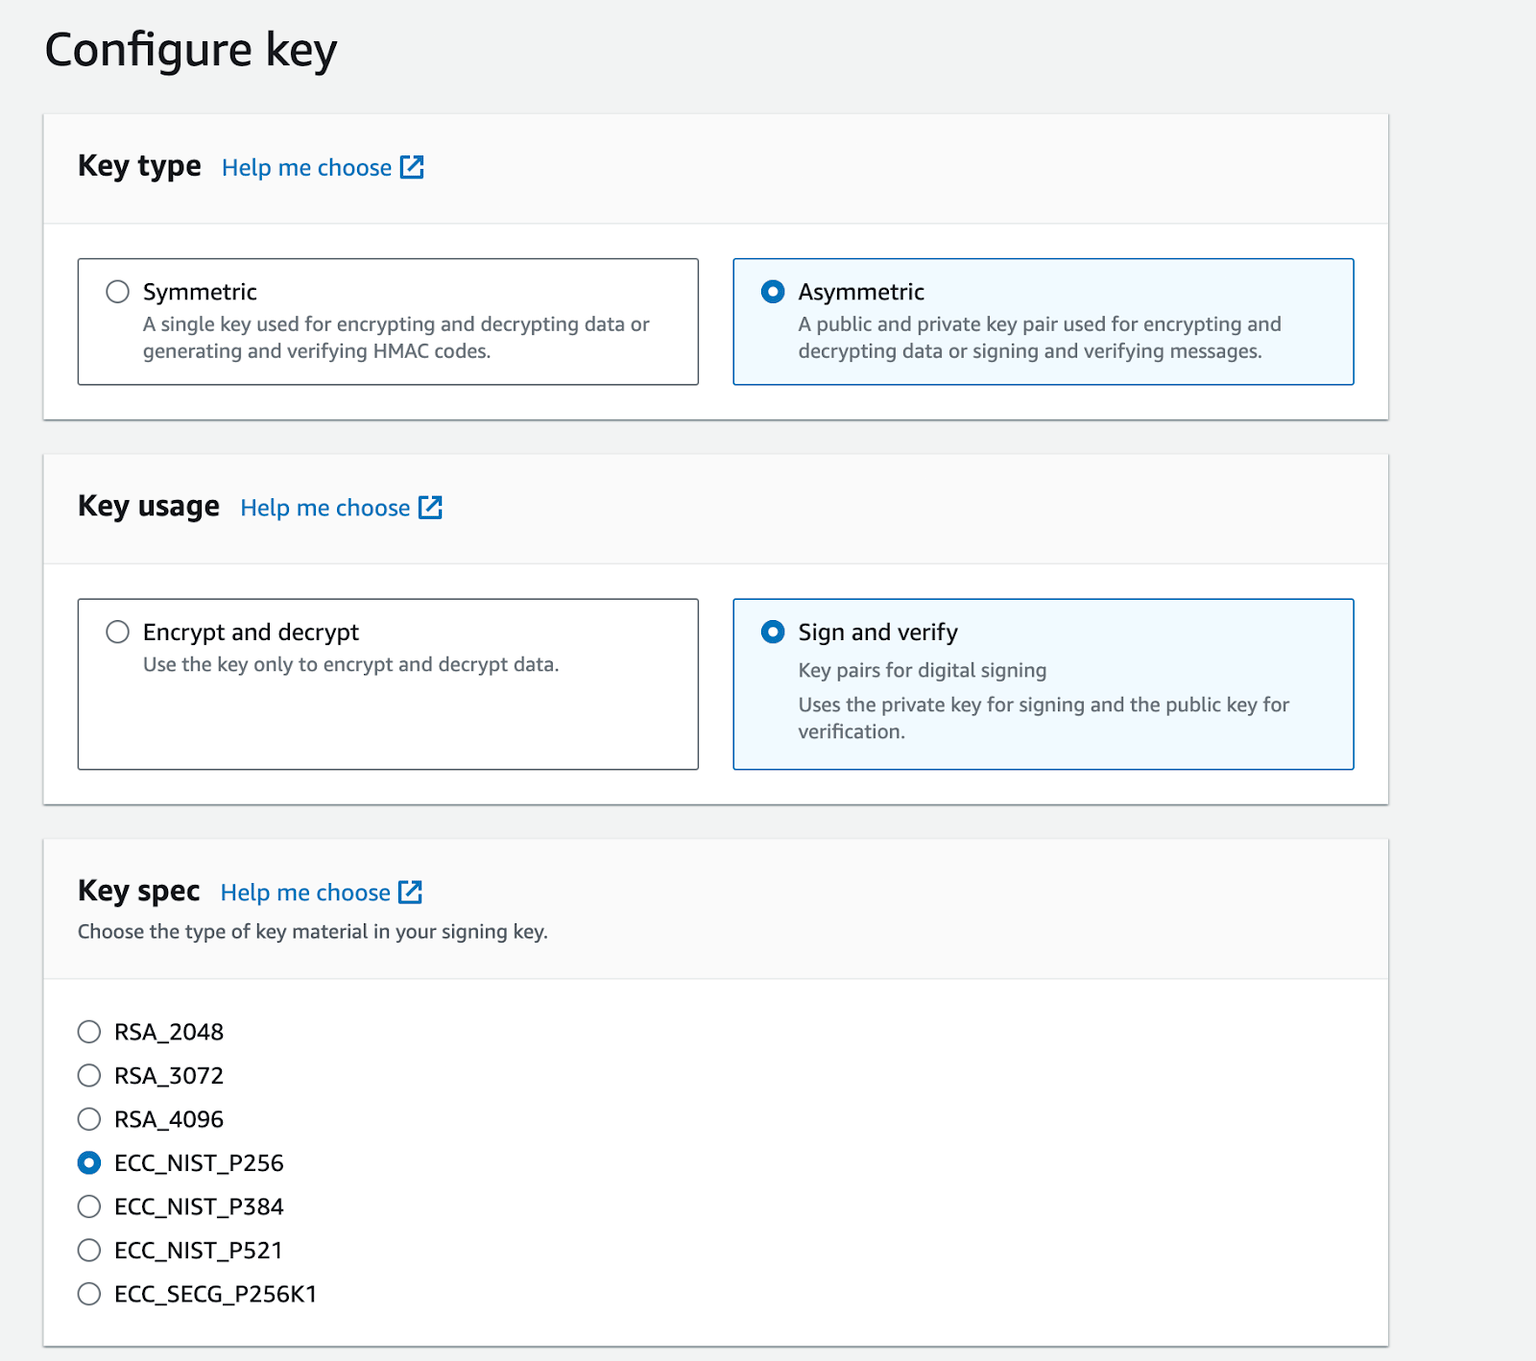
2
Add a label
Enter an alias for the key, for example 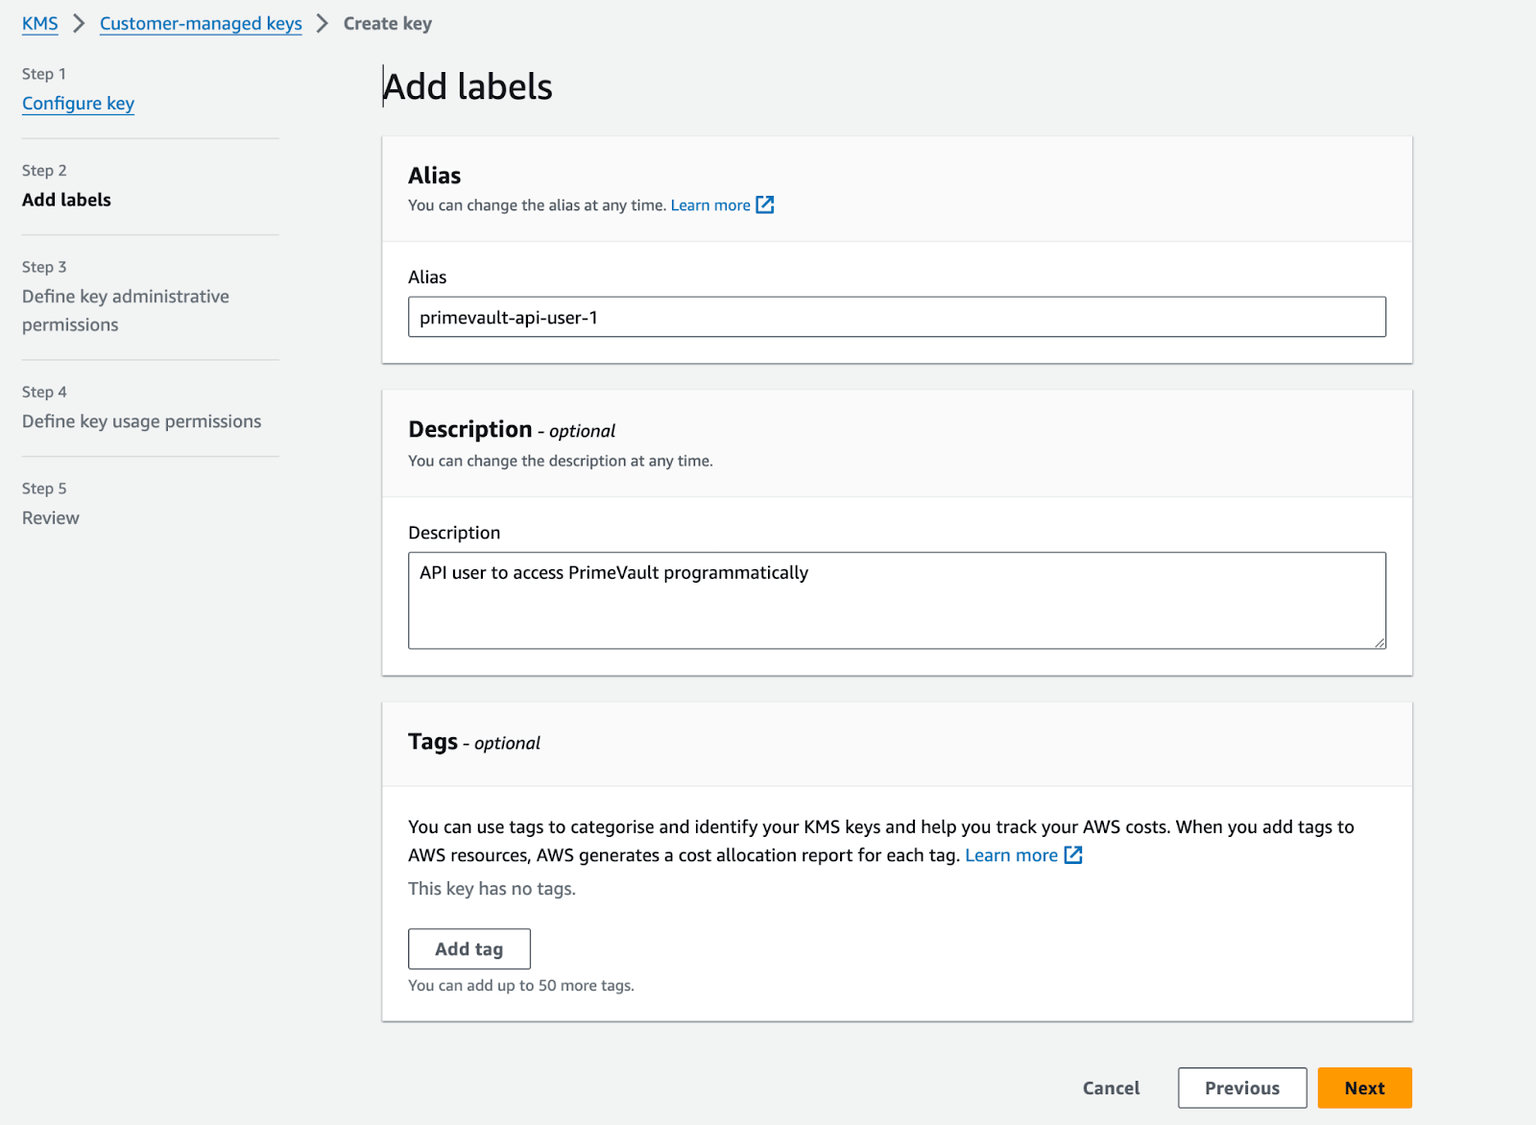
primevault-api-user-1. The description is optional.3
Define key administrators
Select the IAM users or roles that manage your KMS keys, for example your platform admin role.
4
Skip key usage permissions
Do not select any key users. Select Next. The signing policy in the next section gives your application access to this key.
5
Review and create the key
Review the settings, then select Finish. KMS shows a success message and lists the new key.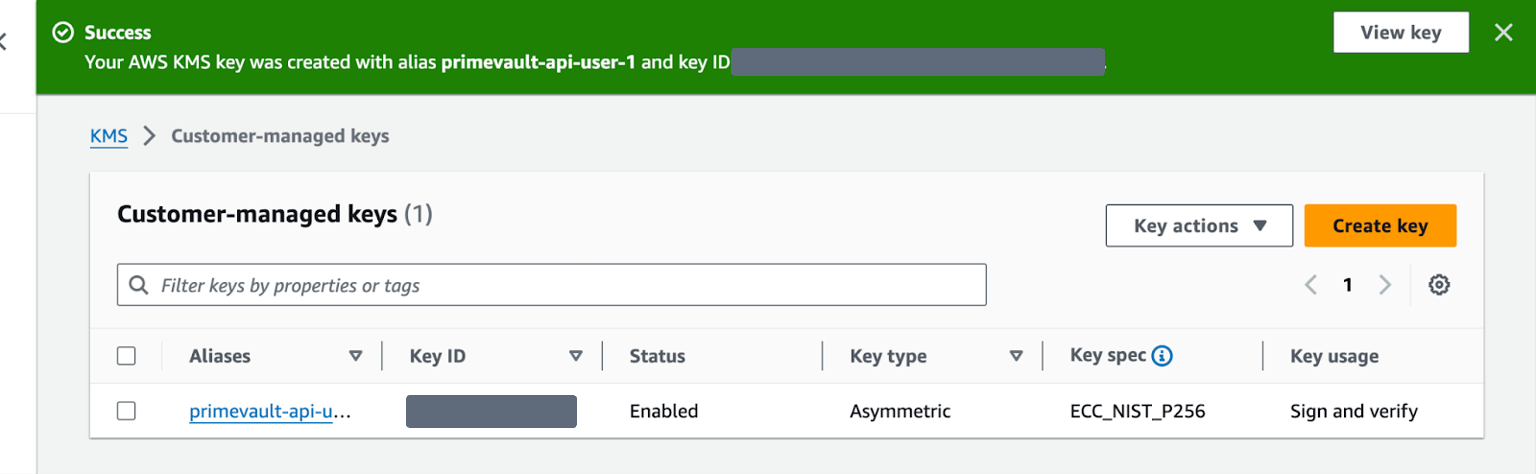
6
Copy the key details
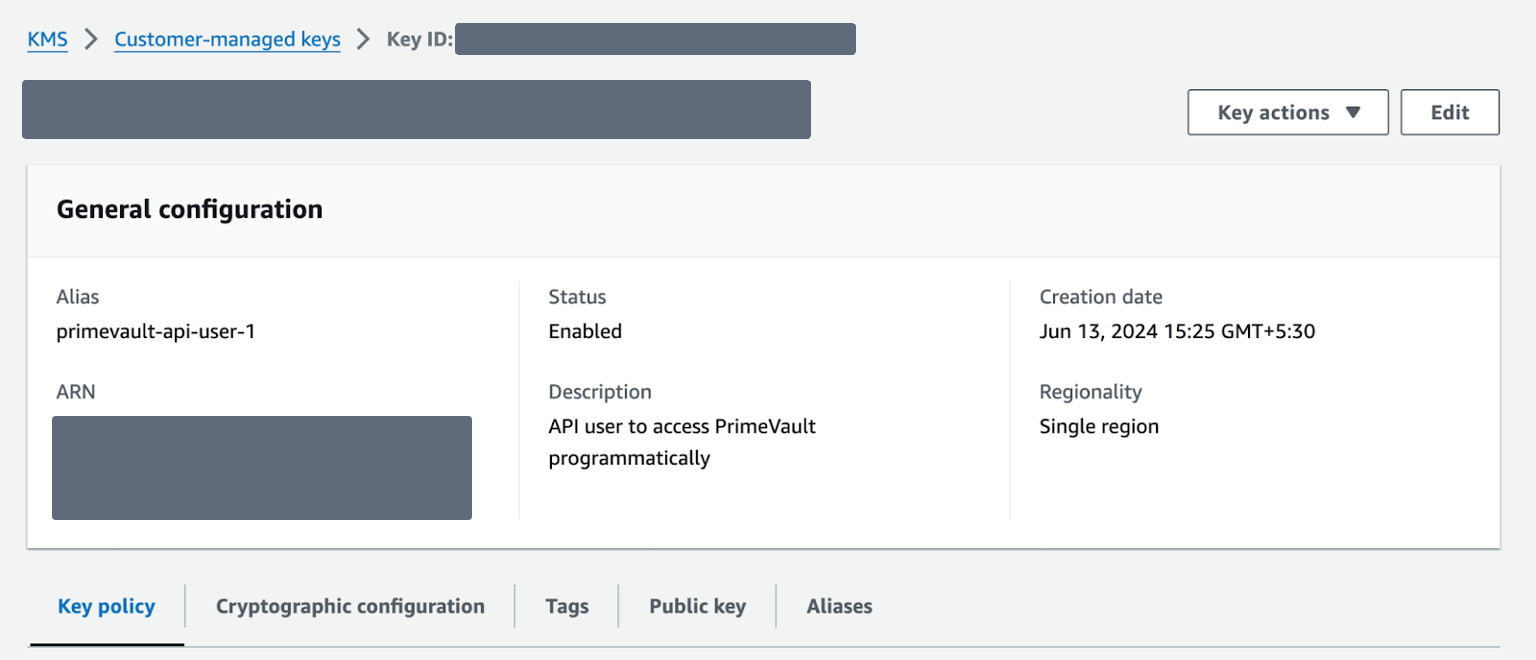
Open the key’s detail page and copy these values:
- ARN: you need it for the signing policy.
- Key ID: save it as an environment variable. You need it to initialize the API client in your code.
- Public key: open the Public key tab and copy the public key.
-
Region: note the AWS region of the key.
Create the signing policy
This IAM policy allows signing with your KMS key only.- In the AWS console, go to IAM > Policies > Create policy > JSON.
- Paste the policy below. Replace the
Resourcevalue with the ARN of your KMS key. - Name the policy, for example
primevault-kms-sign, then create it.
Give your application access to the key
Attach the signing policy to the IAM role that your application uses. Follow Option 1 for EC2 or Option 2 for EKS.Option 1: EC2
Only EC2 instances with this role can sign with the key.If an IAM role is already attached to the EC2 instance, attach the
primevault-kms-sign policy to that role. You don’t need to do the steps below. You can see the attached role on the instance’s detail page.1
Create an IAM role
In the AWS console, go to IAM > Roles > Create role. For the trusted entity type, select AWS service. For the use case, select EC2.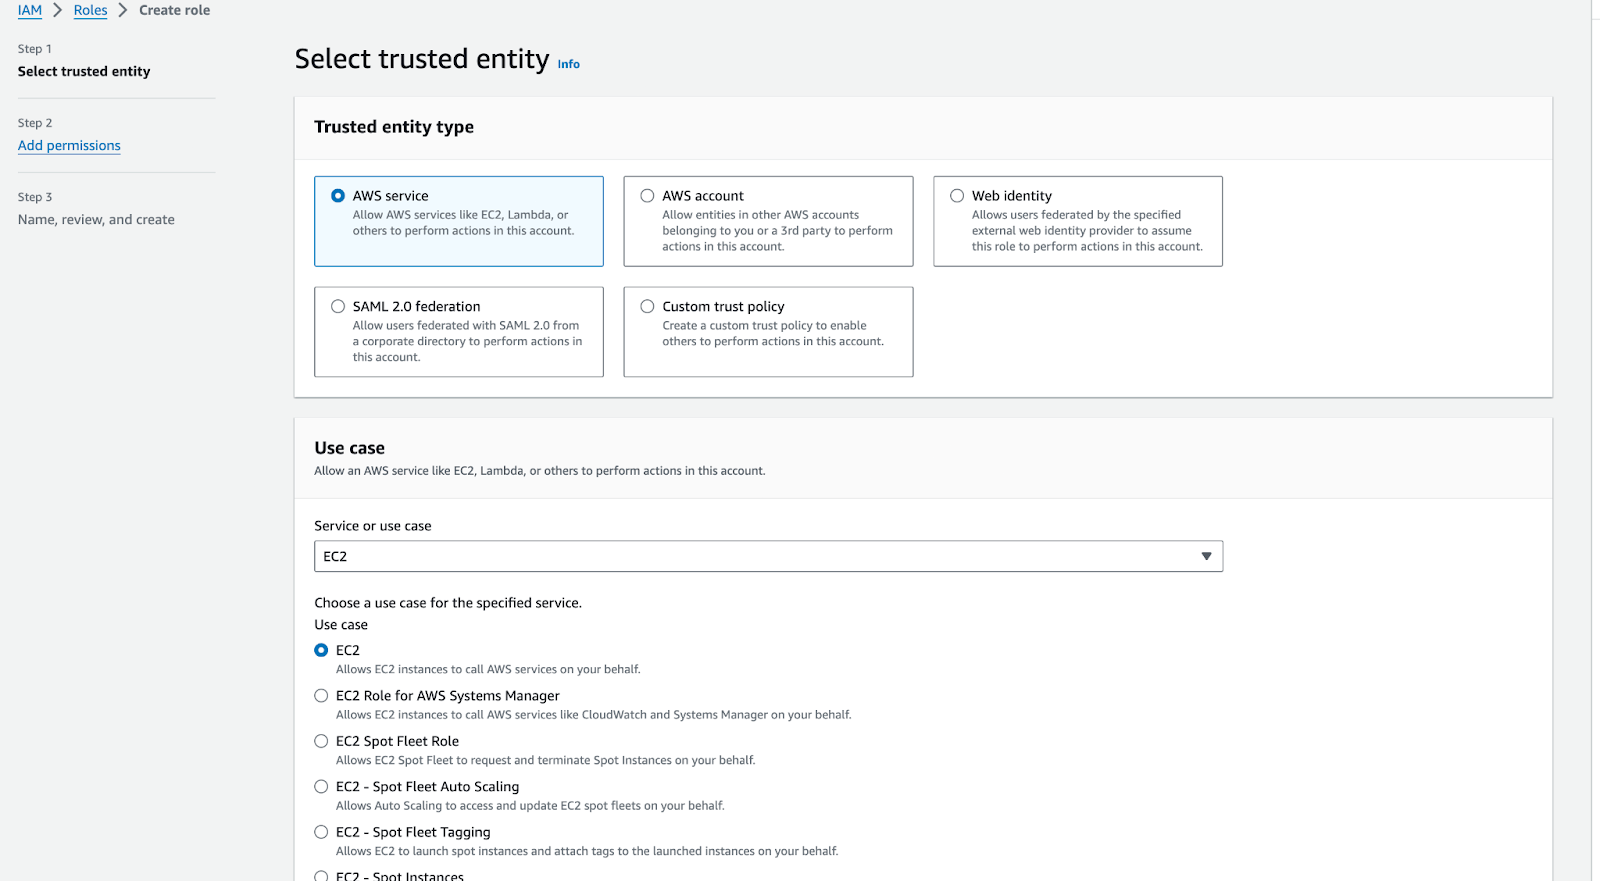
2
Attach the signing policy
Search for
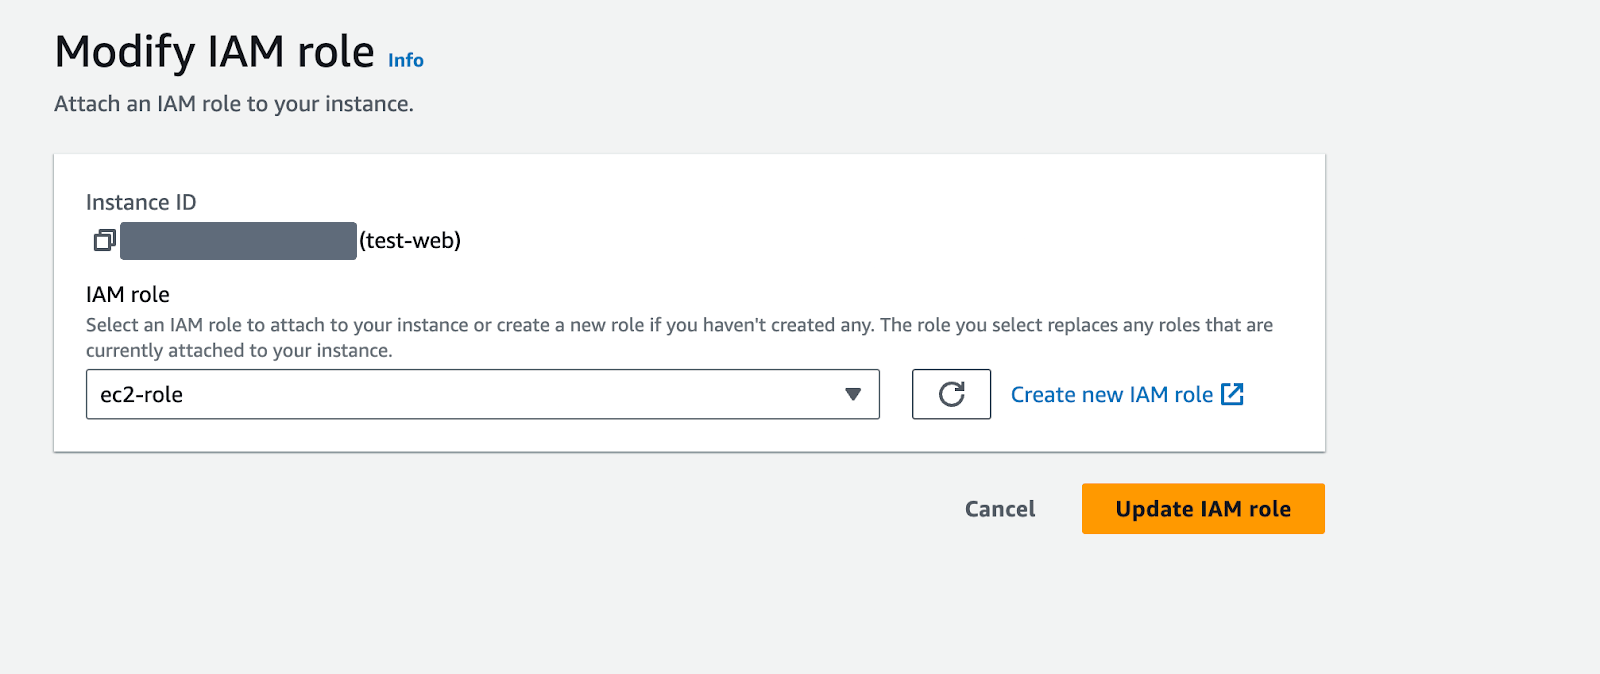
primevault-kms-sign and select it. Name the role, for example ec2-role, then create it.3
Assign the role to the EC2 instance
Open the EC2 instance’s detail page. Select Actions > Security > Modify IAM role.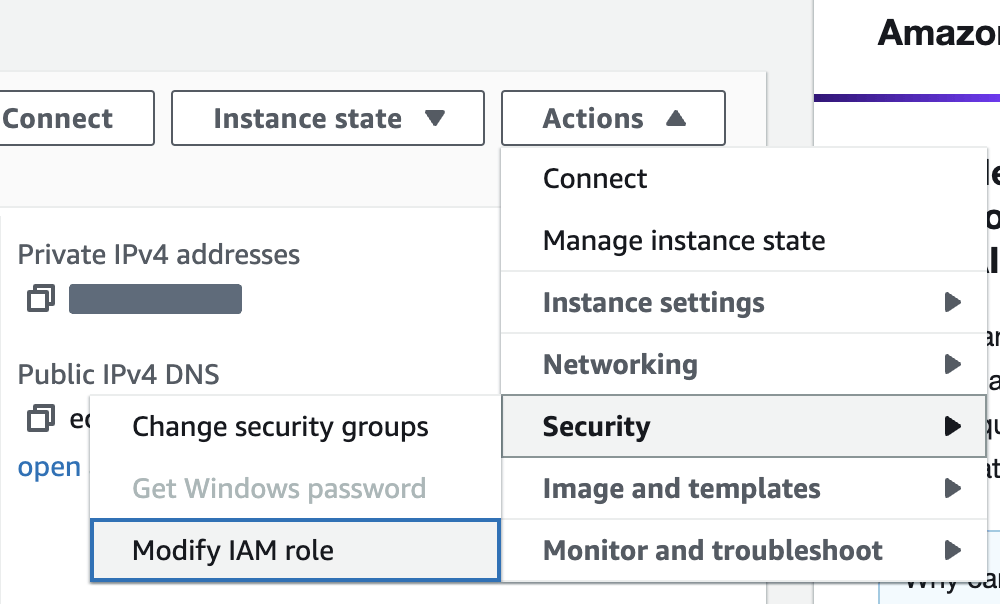
Option 2: EKS
Your Pods get AWS permissions through IAM roles for service accounts. The AWS tutorial IAM roles for service accounts shows how to associate an IAM role with a Kubernetes service account and configure your Pods to use it. Do these steps after your EKS cluster is set up. Follow the tutorial with the changes below.1
Create an IAM OIDC provider for your cluster
Complete the steps in Create an IAM OIDC provider for your cluster.If you get a permission denied error, give the required permissions to the AWS user that sets up the cluster. Go to IAM > Policies > Create policy > JSON, and create a policy with the permissions below.If you still have issues, use the AWS Management Console option in the tutorial.
2
Assign an IAM role to a Kubernetes service account
Follow Assign IAM roles to Kubernetes service accounts with these changes:Replace Check the attached policies:The output must include the ARN of the
- Skip step 1. You already created the signing policy.
- In step 2, run this command:
111122223333 with your AWS account ID and my-cluster with the name of your cluster. Replace my-role and my-service-account with descriptive names, for example eks-kms-access-role.Validate the role’s trust policy. Compare the output with the output in the tutorial:primevault-kms-sign policy.3
Configure Pods to use the service account
Configure the Pods that run the PrimeVault SDK to use the service account from the previous step (
my-service-account or the name you used). Follow the steps in Configure Pods to use a Kubernetes service account.4
Check your AWS SDK version
Make sure your AWS SDK version is supported. See Use IRSA with the AWS SDK.
Register the public key and configure the SDK
1
Register the public key in PrimeVault
Add the KMS public key when you create the API user, then activate the user and save its API key. See Setting up API user for production.
2
Configure the SDK
Set the signature service and the AWS region of the KMS key in the SDK config. Pass the KMS key ID when you create the API client:The SDK gets AWS credentials from the EC2 instance role or the Pod’s service account. You don’t need AWS access keys in your code.The JavaScript SDK repository has the full code example for setting up the API client.
Related
Production setup
Register your public key, assign a role, and activate the API user.
Permissions
Understand Admin and User roles.